Deploy Tailcall on AWS Lambda
Before deploying tailcall on AWS Lambda, you need to generate the AWS Access Key ID and Secret Access Key. If you don't have an AWS account, you can create one here.
Generate Access Keys for AWS
Follow the steps below to generate the Access Keys:
-
Go to AWS Management Console and click the drop down menu in the top right corner and Click on
Security credentials.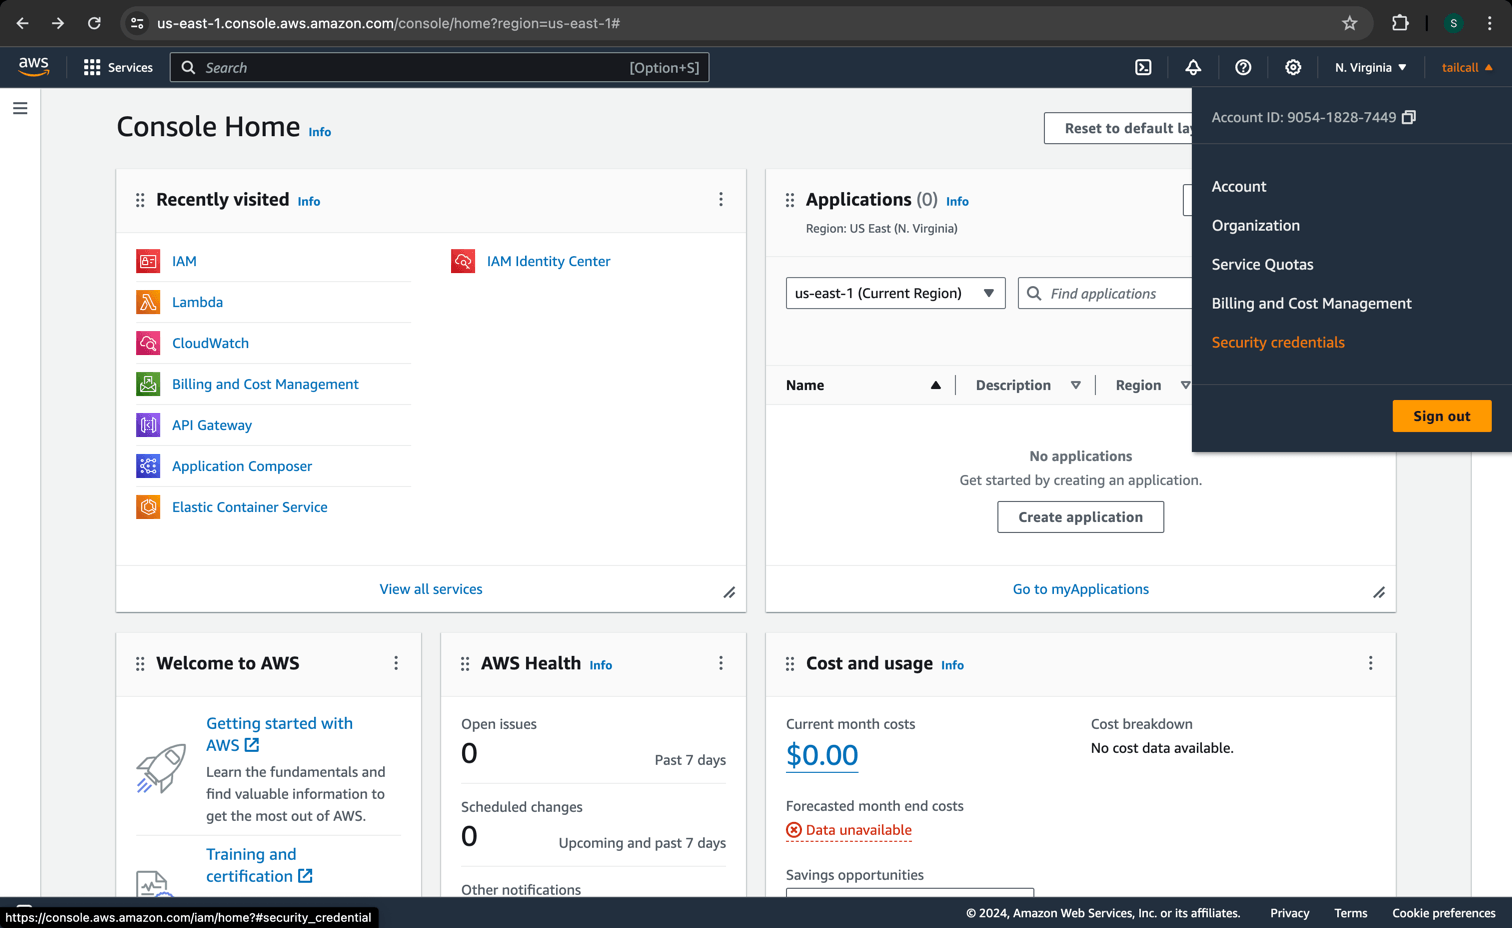
-
Scroll down to the
Access Keyssection and click onCreate access key.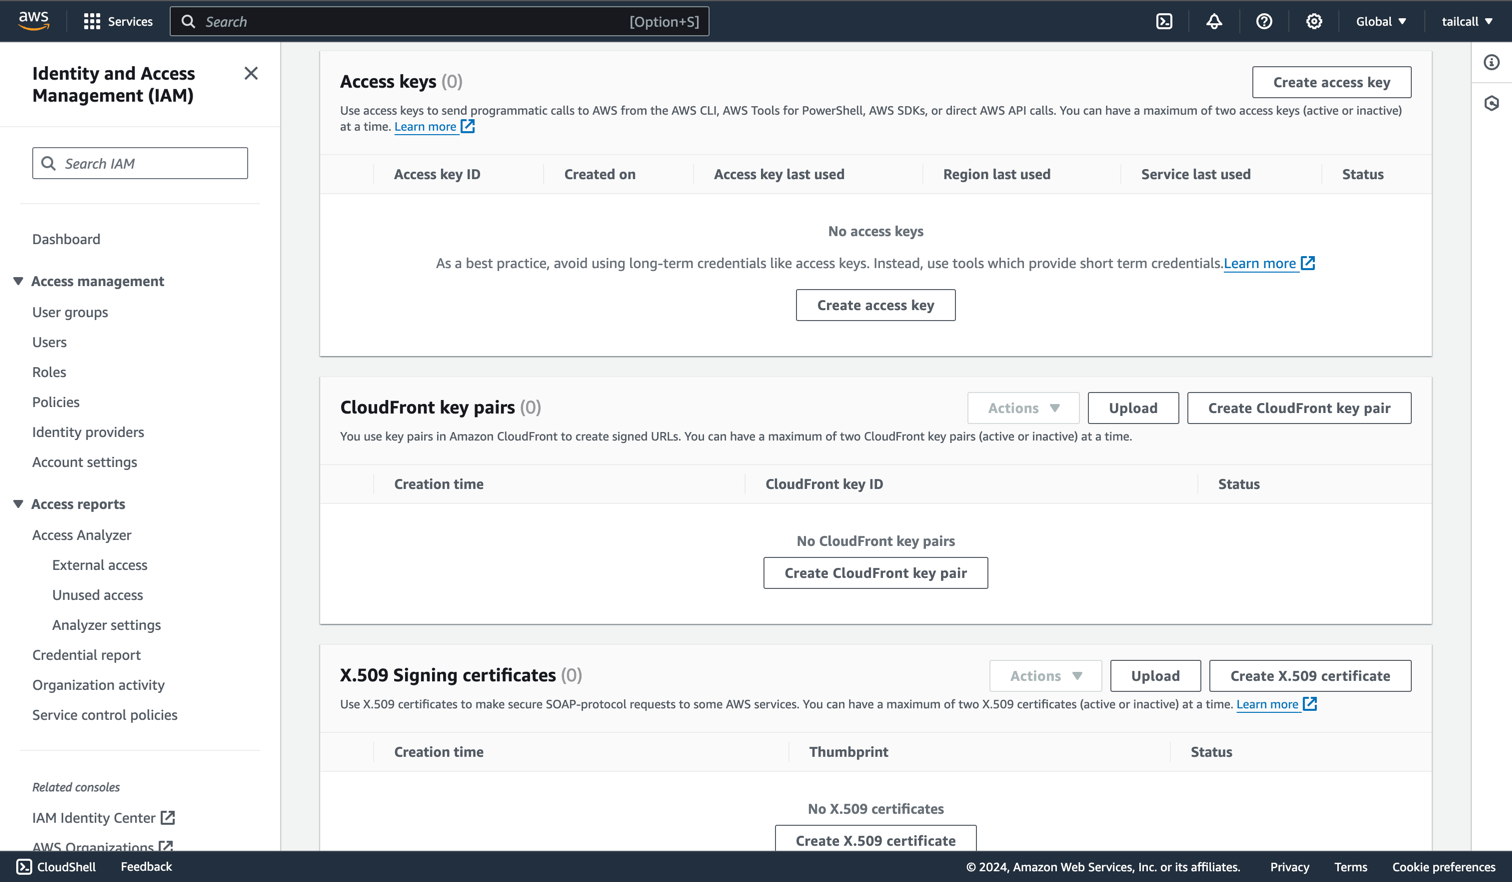
-
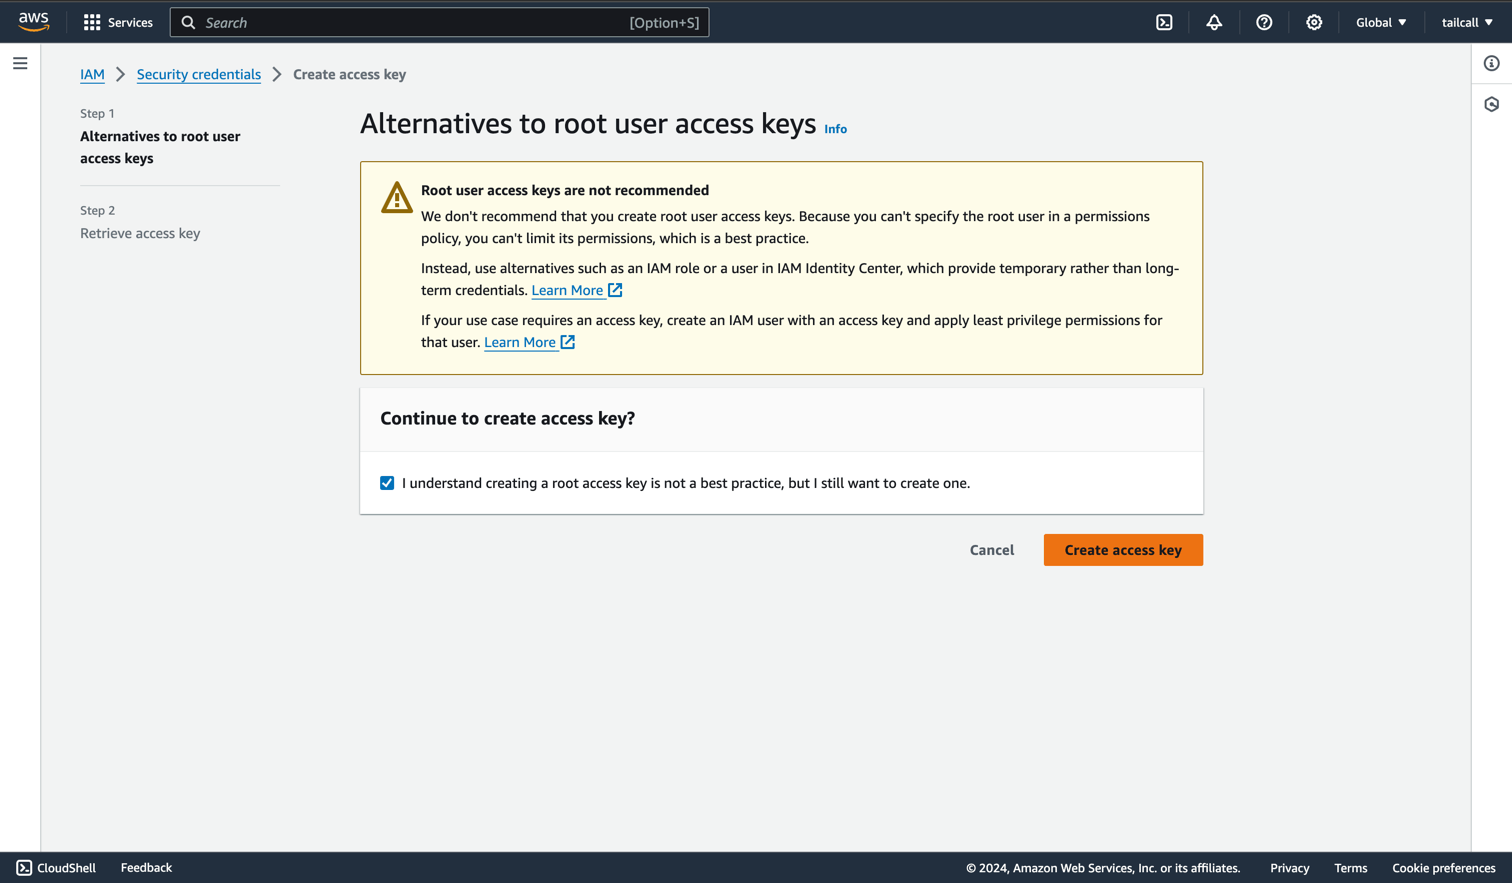
You will get the following warning since we are trying to create access keys for the root user. For this guide, we will continue with creating the access keys. If you do not want to continue with the root user, you can learn more about the AWS security credentials here and managing access keys here.
-
Once you click on
Create access key, you will get theAccess key IDandSecret access key. Make sure to download theCSVfile and store it securely.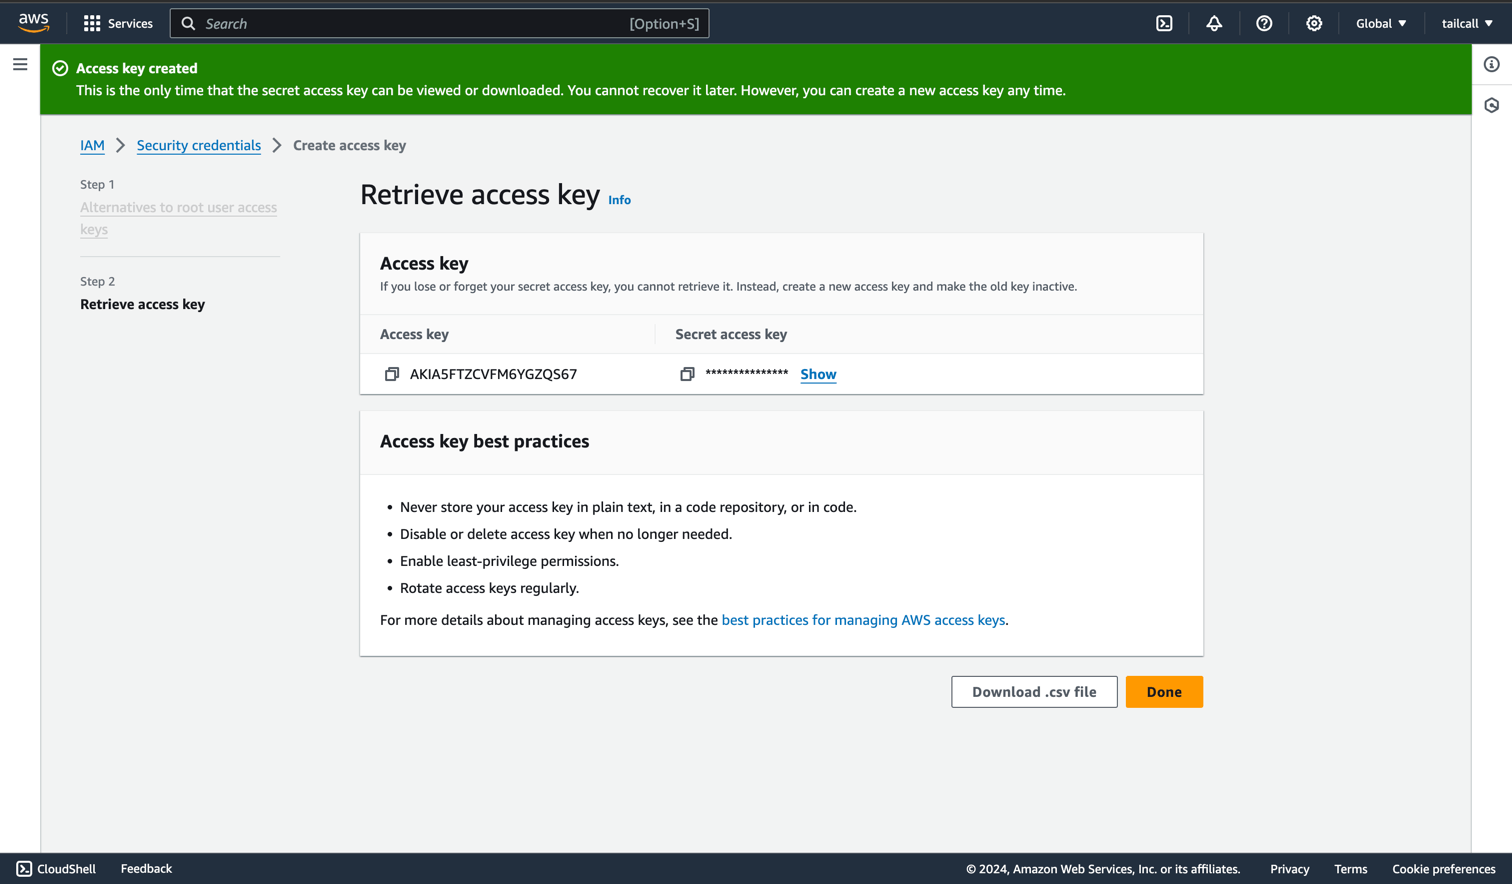
Terraform setup
Now that you have the AWS Access Key ID and Secret Access Key, you will need to generate API token for terraform and setup a terraform organization and workspace. If you don't have a Terraform Cloud account, you can create one here.
Terraform API Token
Follow these steps to generate the Terraform API token:
-
Go to the Tokens section in Settings and click on
Create an API token.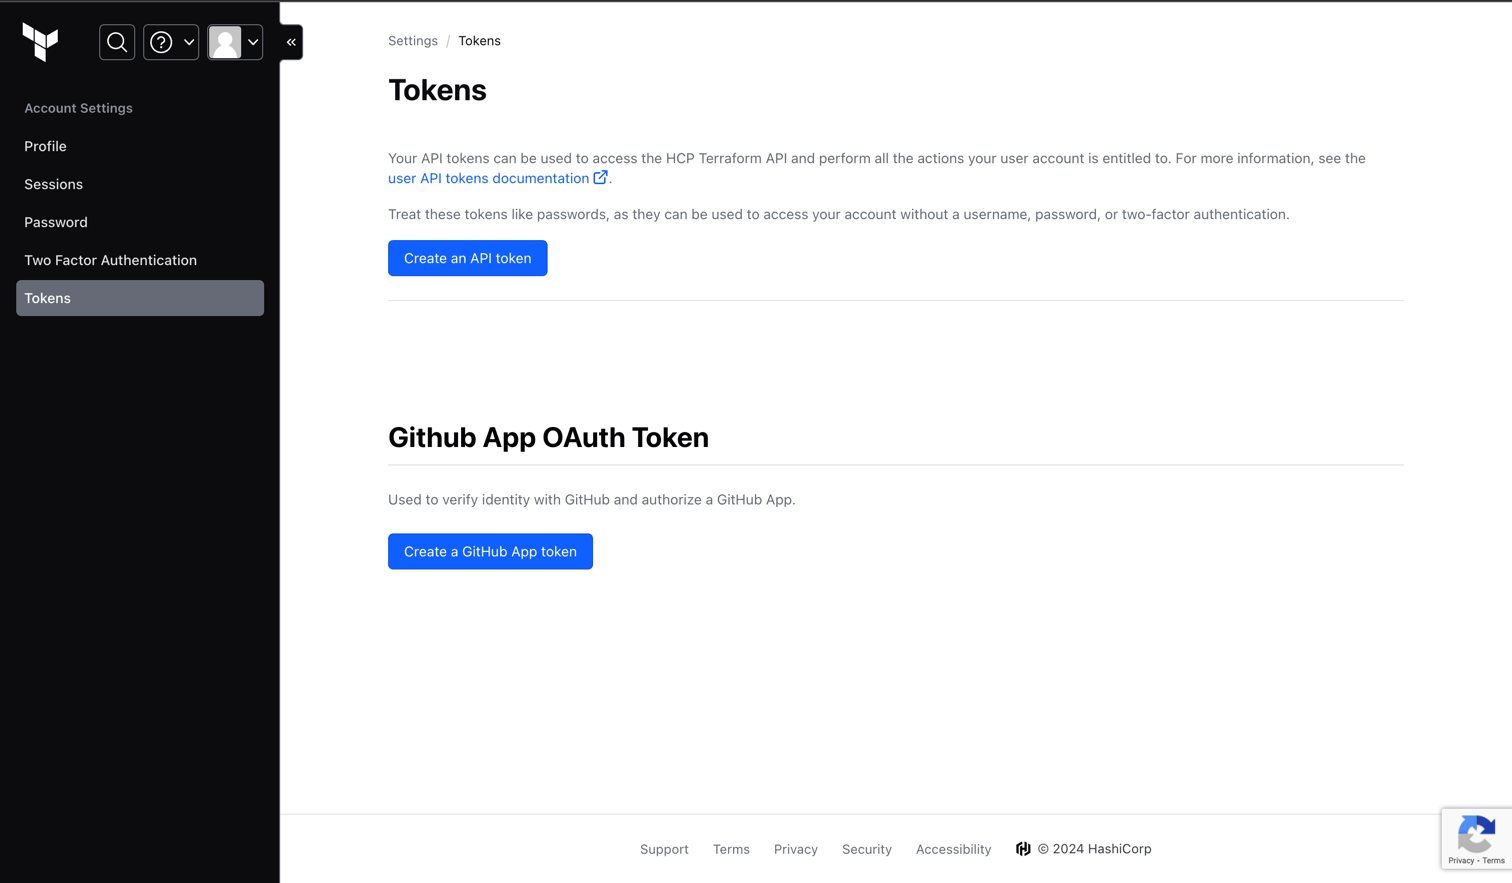
-
Give a description for the token and change the expiration if required. Click on
Generate token.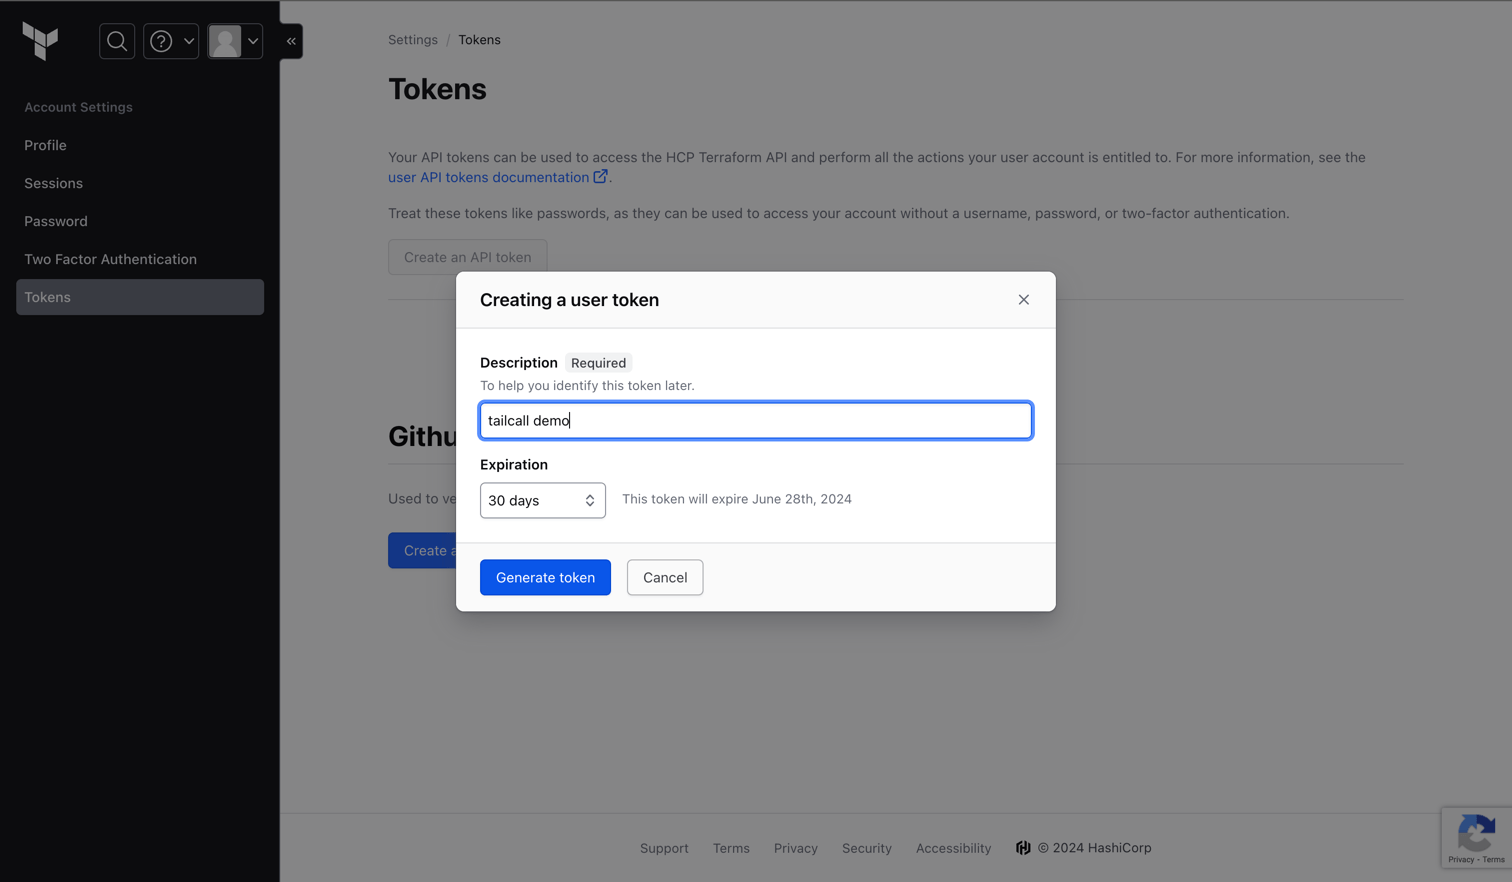
-
Copy the generated token and store it securely.

Terraform Organization and Workspace
-
To create an organization, go to the Organizations section in Settings and click on
Create organization.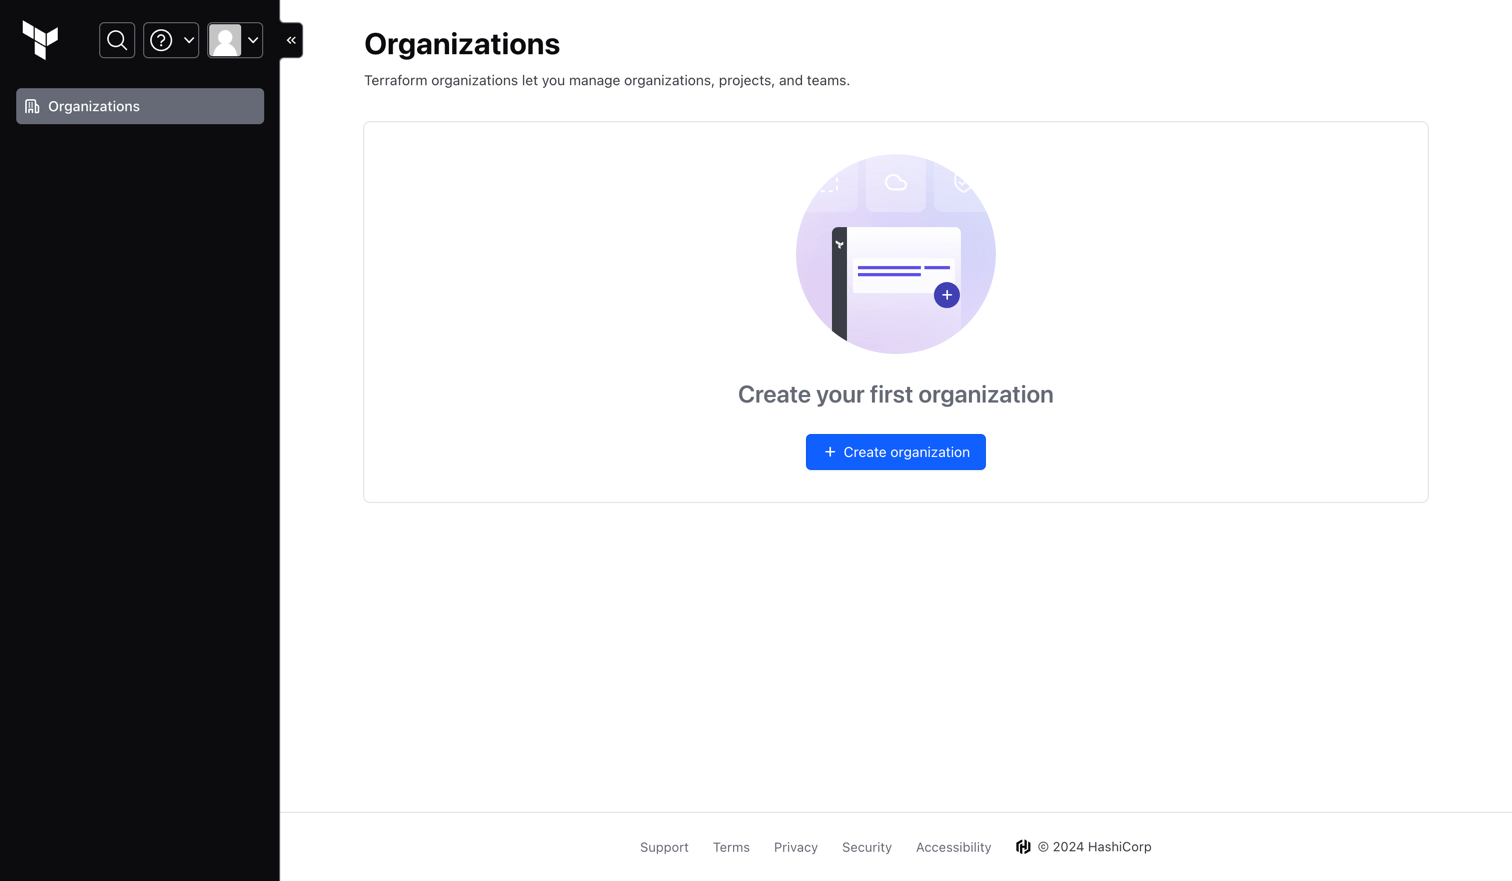
-
Fill in the organization name and email and click on
Create organization.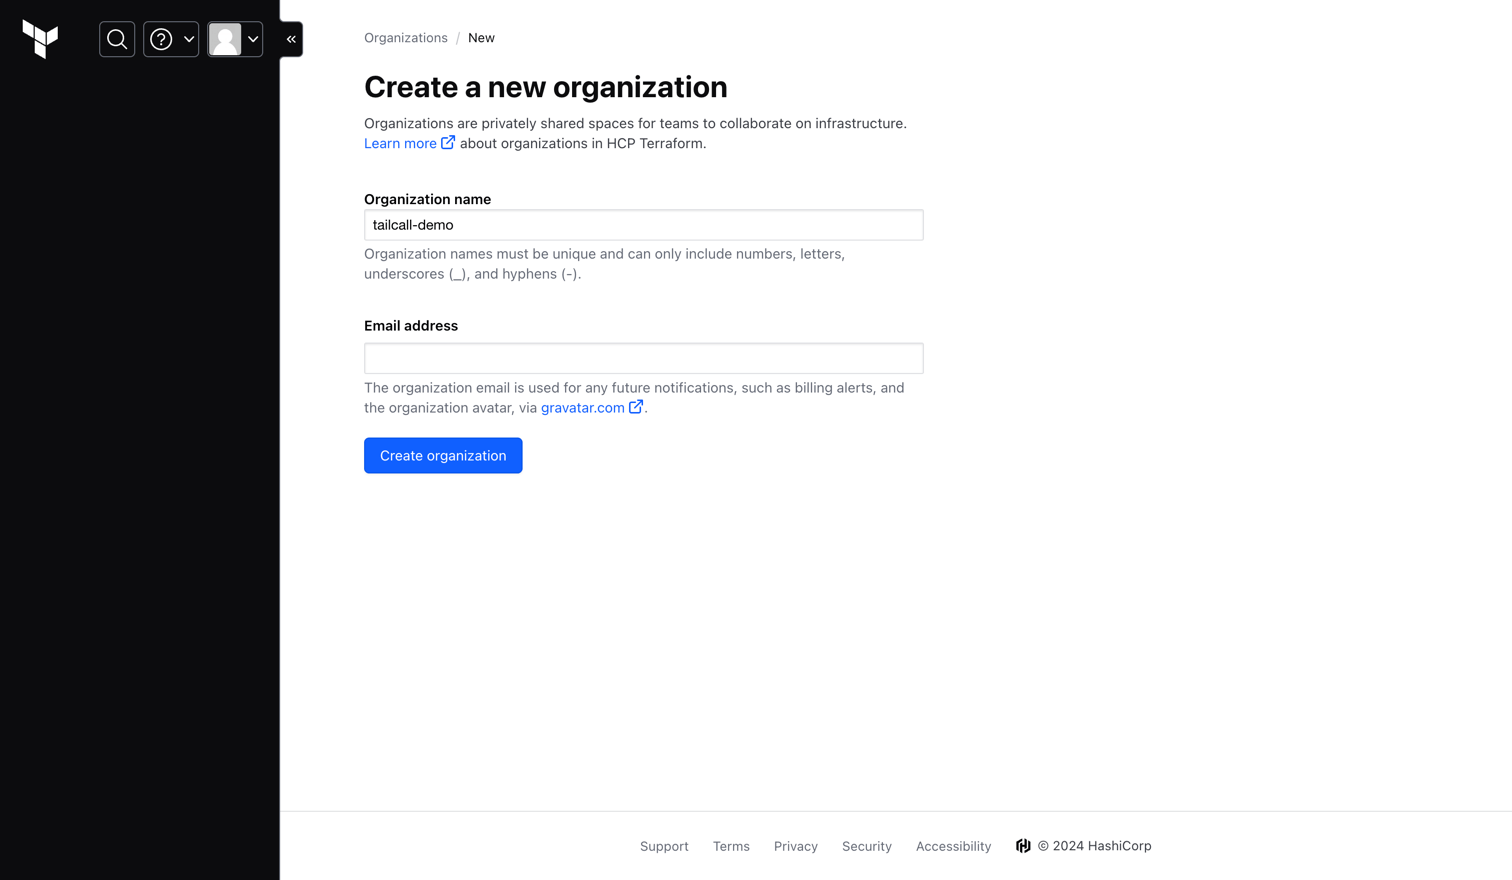
-
Now that you have created an organization, you will be presented with the following page for creating a workspace. Click on
CLI-Driven Workflow, since the github action which we will be using for deployment, tailcallhq/gh-action, uses the terraform CLI.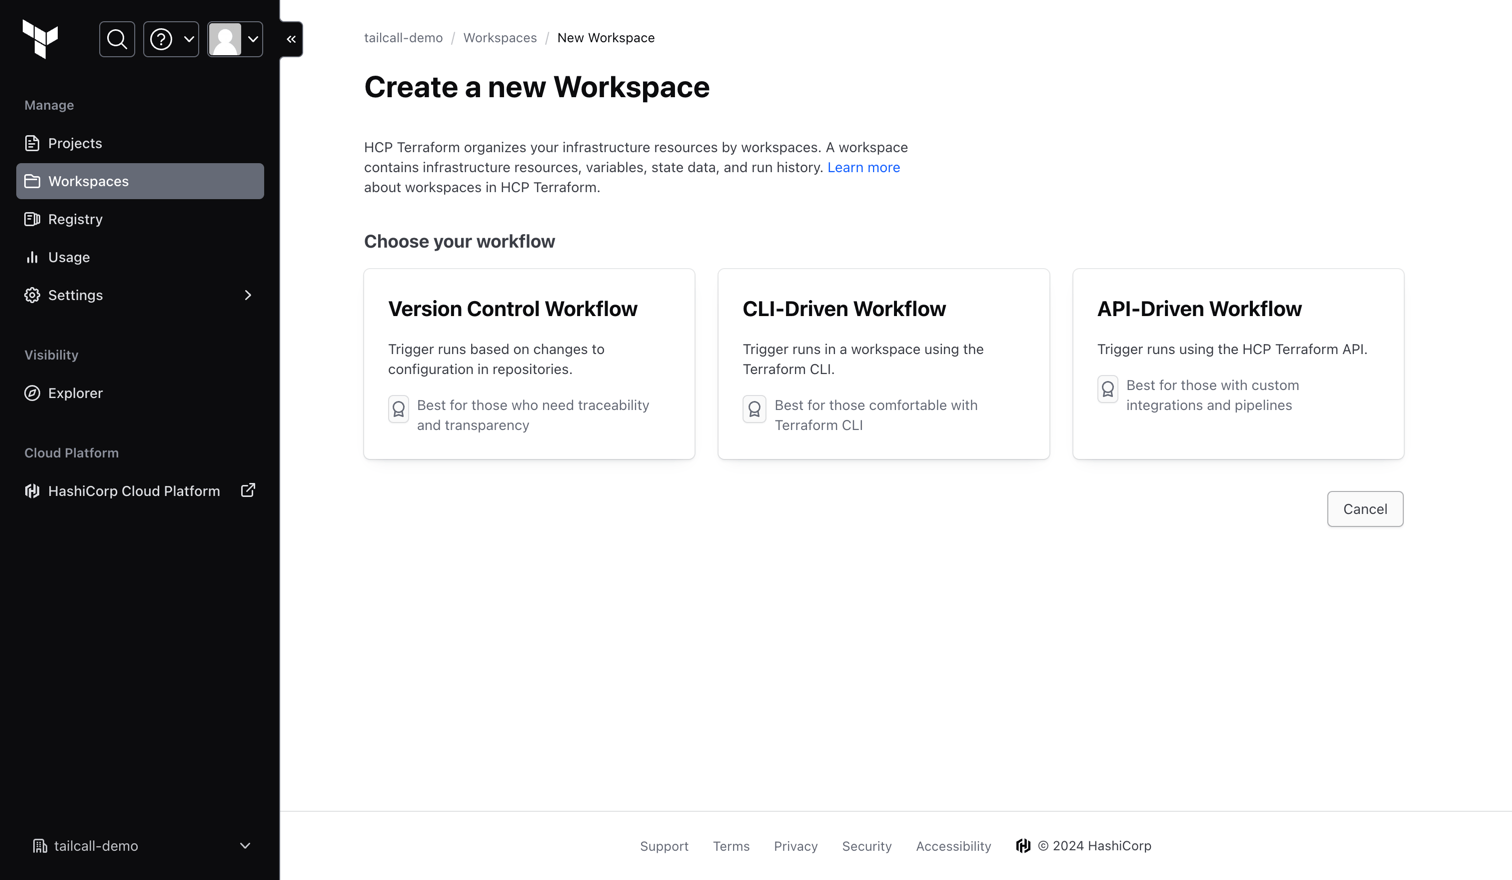
-
Fill in the workspace name. By default the project will be set to
Default Project, if you have any project in terraform cloud, you can select that project, otherwise continue with theDefault Projectand click onCreate.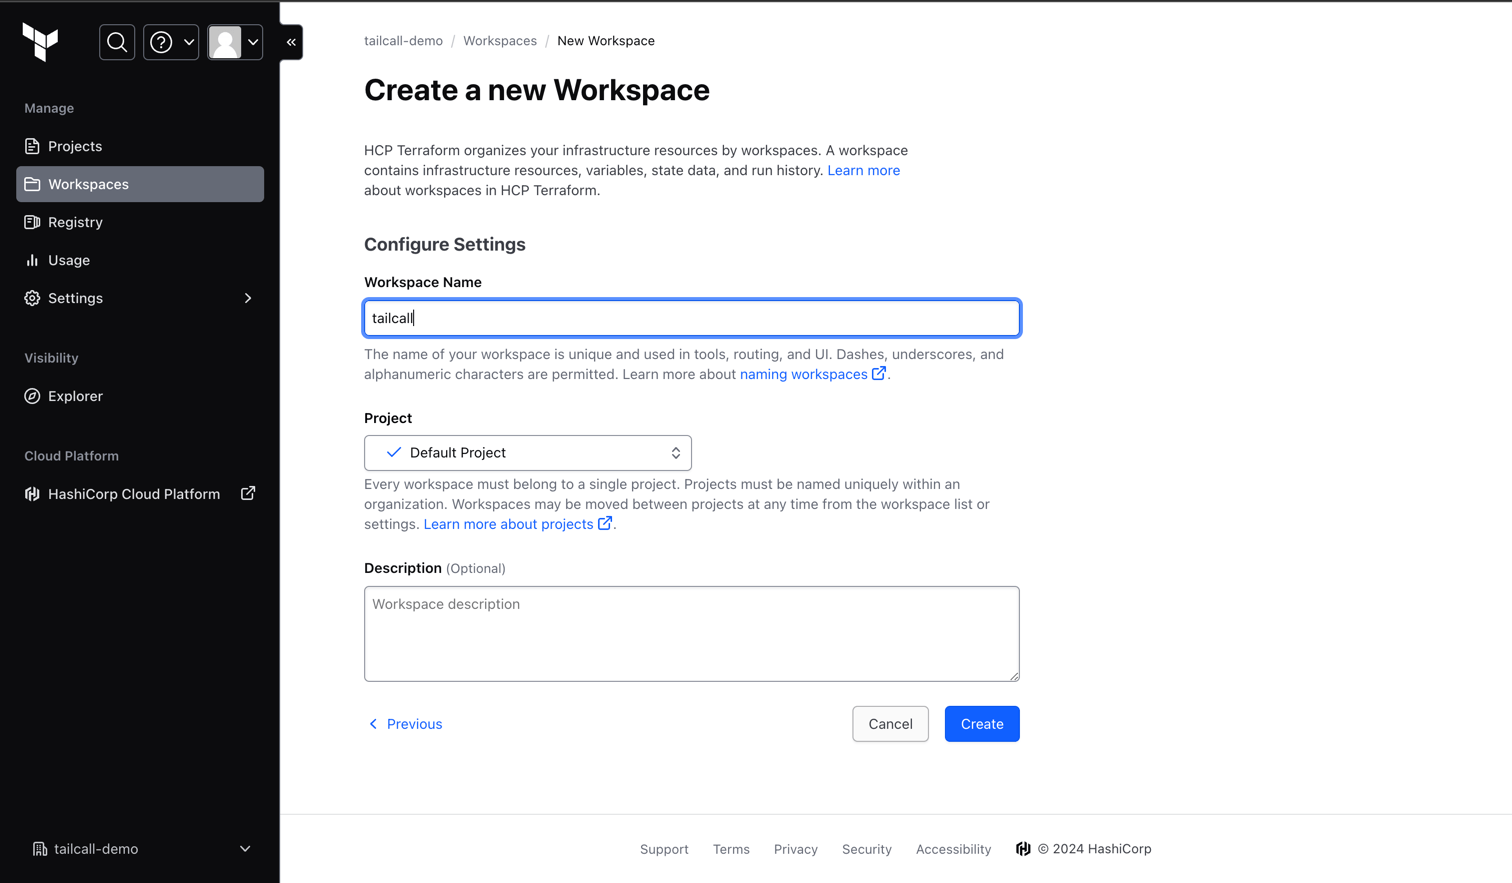
You now have everything required for a successful deployment of your tailcall server on AWS Lambda.
Setting up the project repo
Now you need to create a new repository on Github and use the Github action tailcallhq/gh-action to deploy it. The easiest way to get started is to create a new repository using this template repo https://github.com/tailcallhq/deploy-tailcall.
-
Go to the repo and click on
Use this templateand create a new repository.
-
Give your repository a name and click on
Create repository.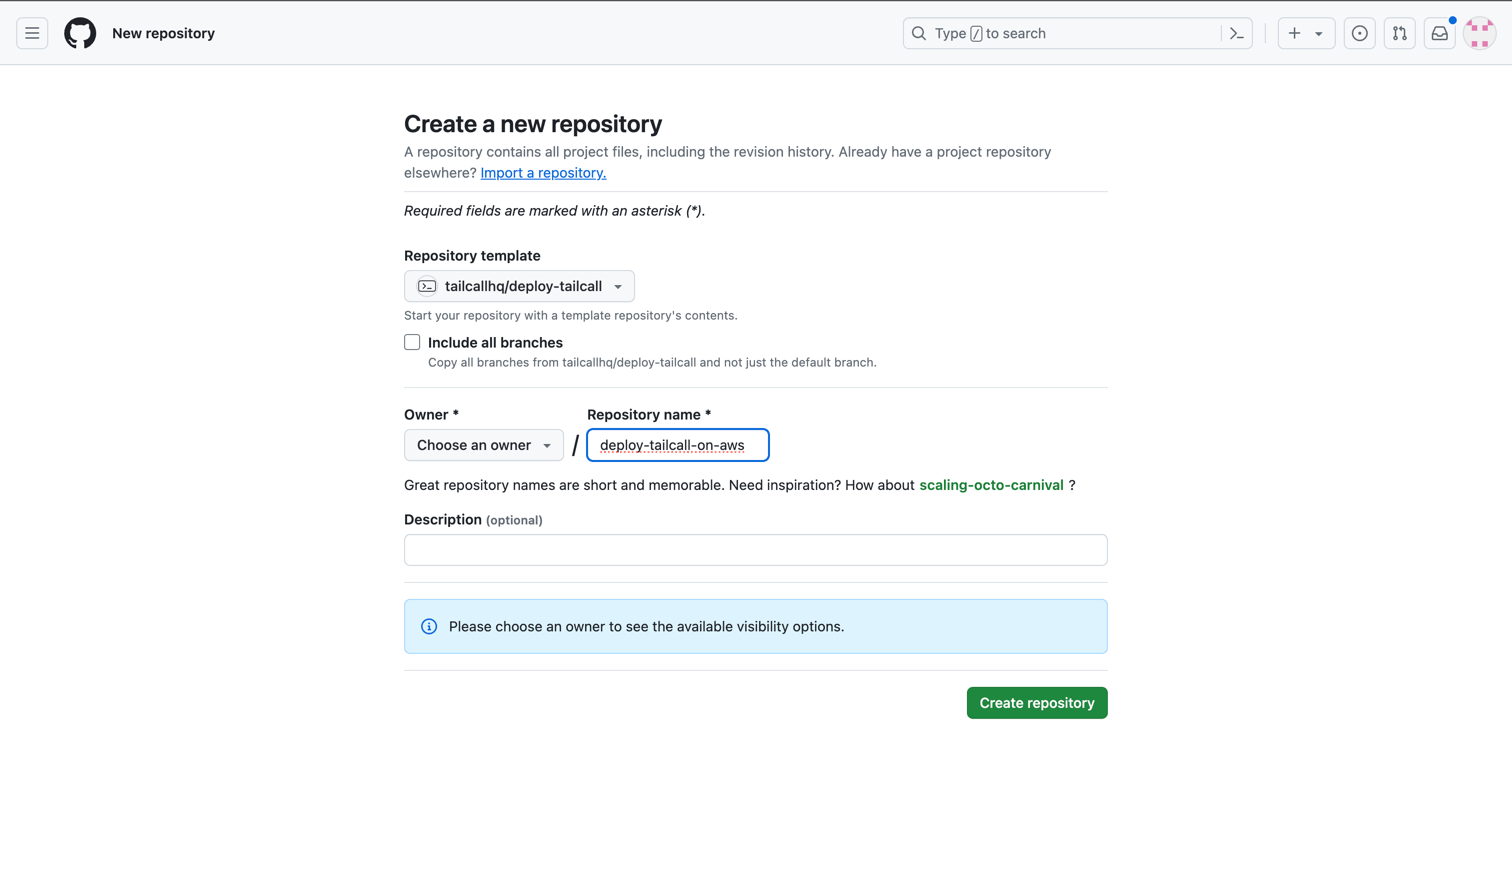
-
Now that you have created a repository, you will need to add the AWS access keys and Terraform API token to the repository secrets. To do that, click on
Settings.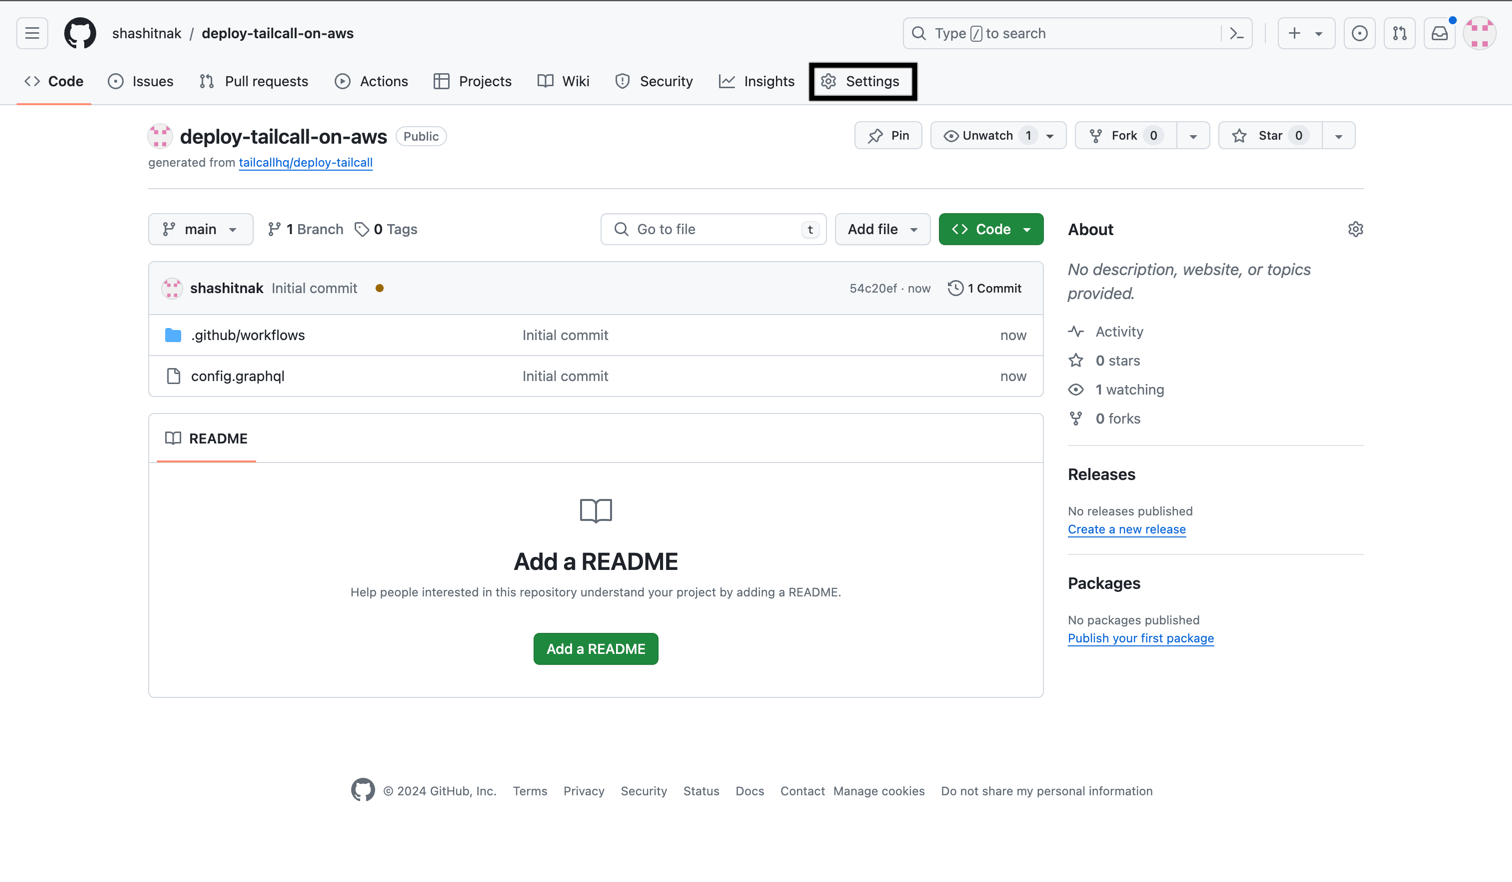
-
Click on
Secrets and variablesin the left side bar to expand the section and click onActions.
-
Click on
New repository secretto add a new secret.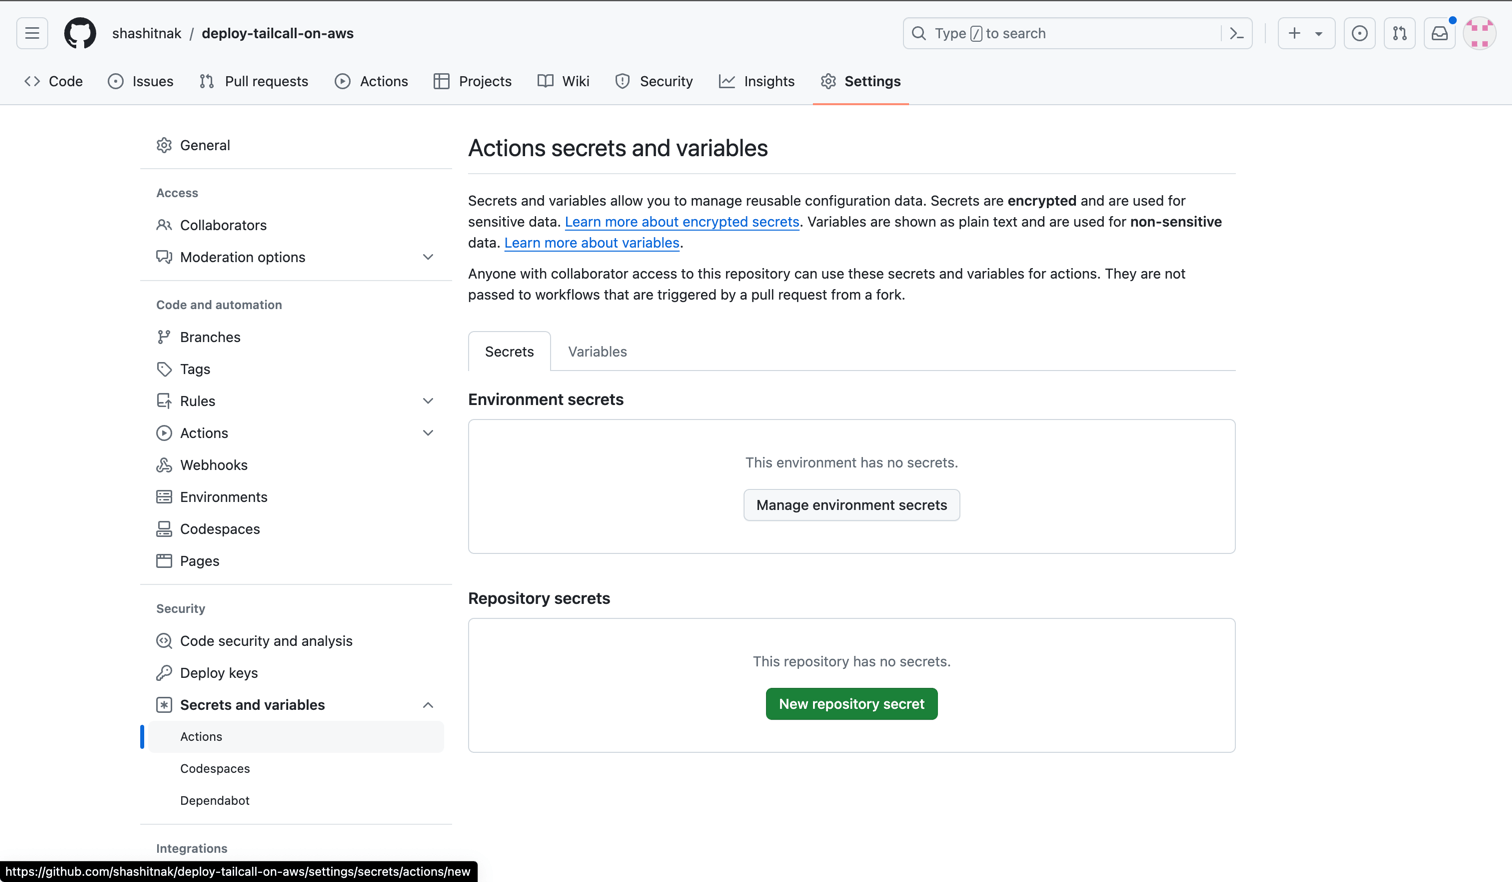
-
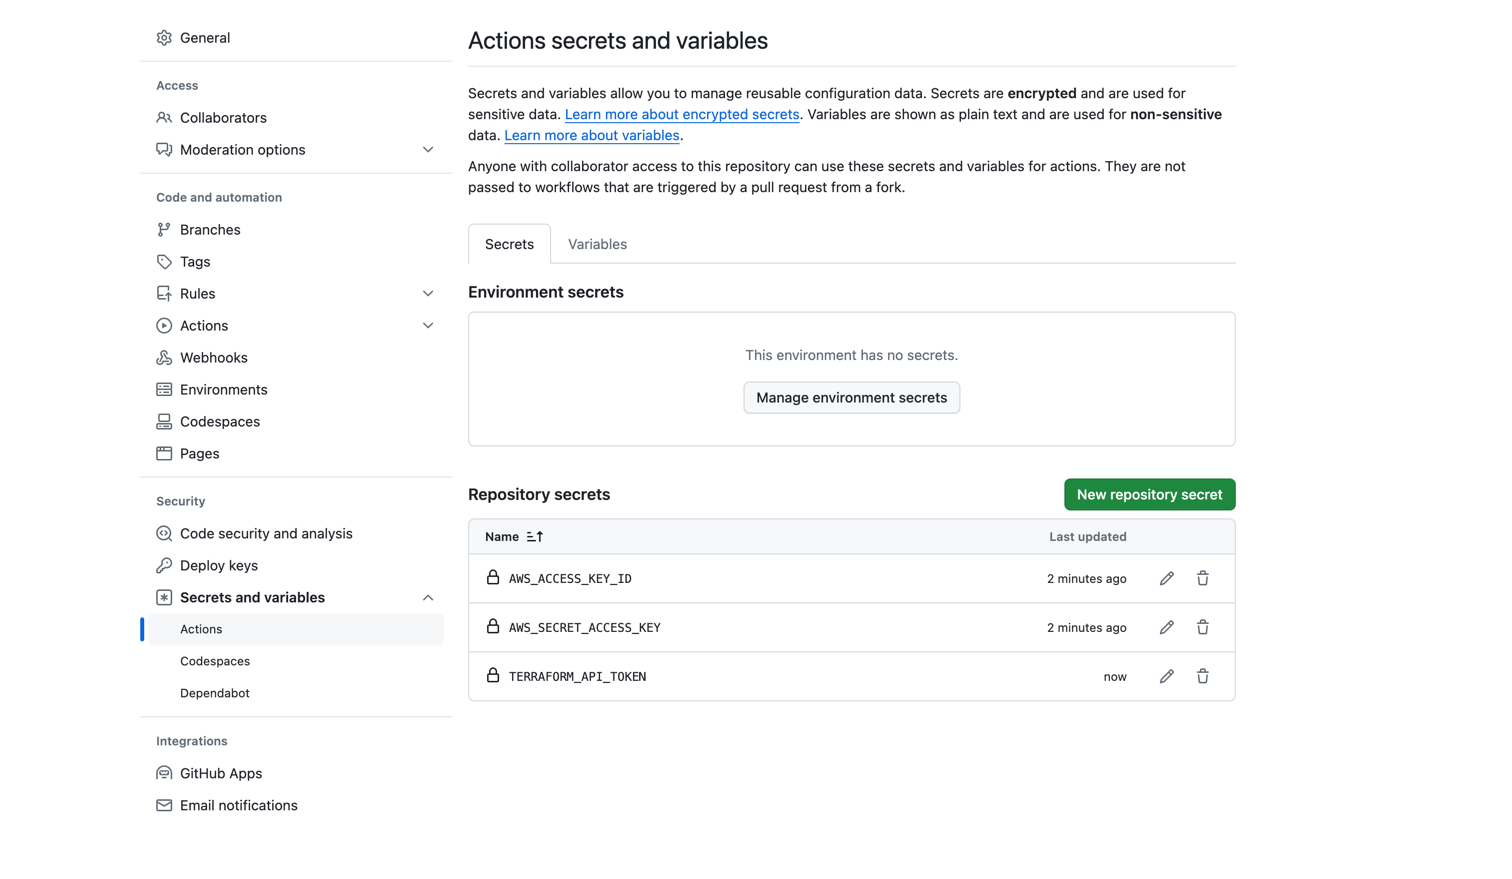
Add the secret name as
AWS_ACCESS_KEY_IDor any name you prefer and paste the AWS access key ID that you generated earlier in the value field. Click onAdd secretto save the secret.
-
Similarly add the AWS secret access key and the Terraform API token as secrets to the repository.
You are now ready to deploy your tailcall server on AWS Lambda using terraform.
Deploy on AWS Lambda using terraform
In this example, we will deploy a simple graphQL server using tailcall, on AWS Lambda using terraform, which will convert the JSONPlaceholder REST API to a GraphQL API.
Below is the config present in the template repo, that will be used for this deployment. You can learn more about this here.
schema {
  query: Query
}

type Query {
  posts: [Post]
    @http(url: "https://jsonplaceholder.typicode.com/posts")
}

type User {
  id: Int!
  name: String!
  username: String!
  email: String!
  phone: String
  website: String
}

type Post {
  id: Int!
  userId: Int!
  title: String!
  body: String!
  user: User
    @http(
      url: "https://jsonplaceholder.typicode.com/users/{{.value.userId}}"
    )
}
To deploy the server, just update the provider to aws in the deploy-tailcall job in the .github/workflows/main.yml file, similar to the example below. Also, update the terraform-workspace and terraform-org as well as the other inputs based on your requirements.
on: [push]

jobs:
  deploy_tailcall:
    runs-on: ubuntu-latest
    name: Deploy Tailcall
    steps:
      - name: Checkout repository
        uses: actions/checkout@v2
      - name: Deploy Tailcall
        id: deploy-tailcall
        uses: tailcallhq/gh-[email protected]
        with:
          provider: "aws"
          aws-access-key-id: ${{ secrets.AWS_ACCESS_KEY_ID }}
          aws-secret-access-key: ${{ secrets.AWS_SECRET_ACCESS_KEY }}
          aws-region: "us-east-1"
          aws-iam-role: "iam_for_tailcall"
          terraform-api-token: ${{ secrets.TERRAFORM_API_TOKEN }}
          terraform-org: "tailcall-demo"
          terraform-workspace: "tailcall"
          tailcall-config: "config.graphql"
After updating the main.yml file, commit the changes and push them to the repository. This will trigger the deployment of the tailcall server on AWS Lambda.